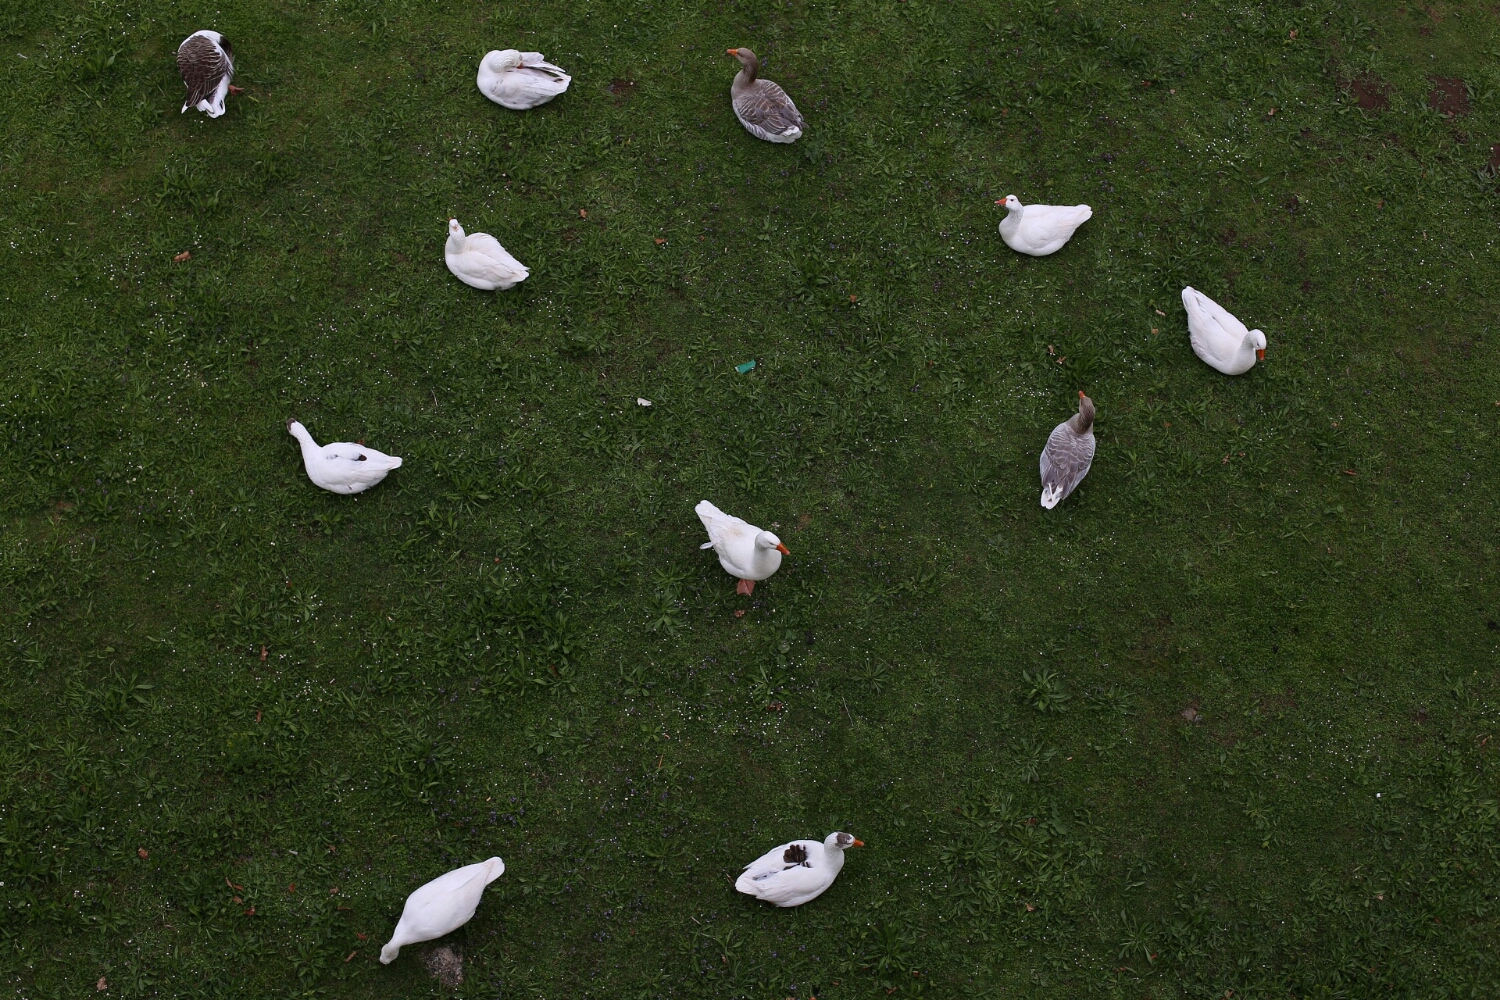
I'm sure they are trying to tell me something but don't know how to join up the geese.
Day 2
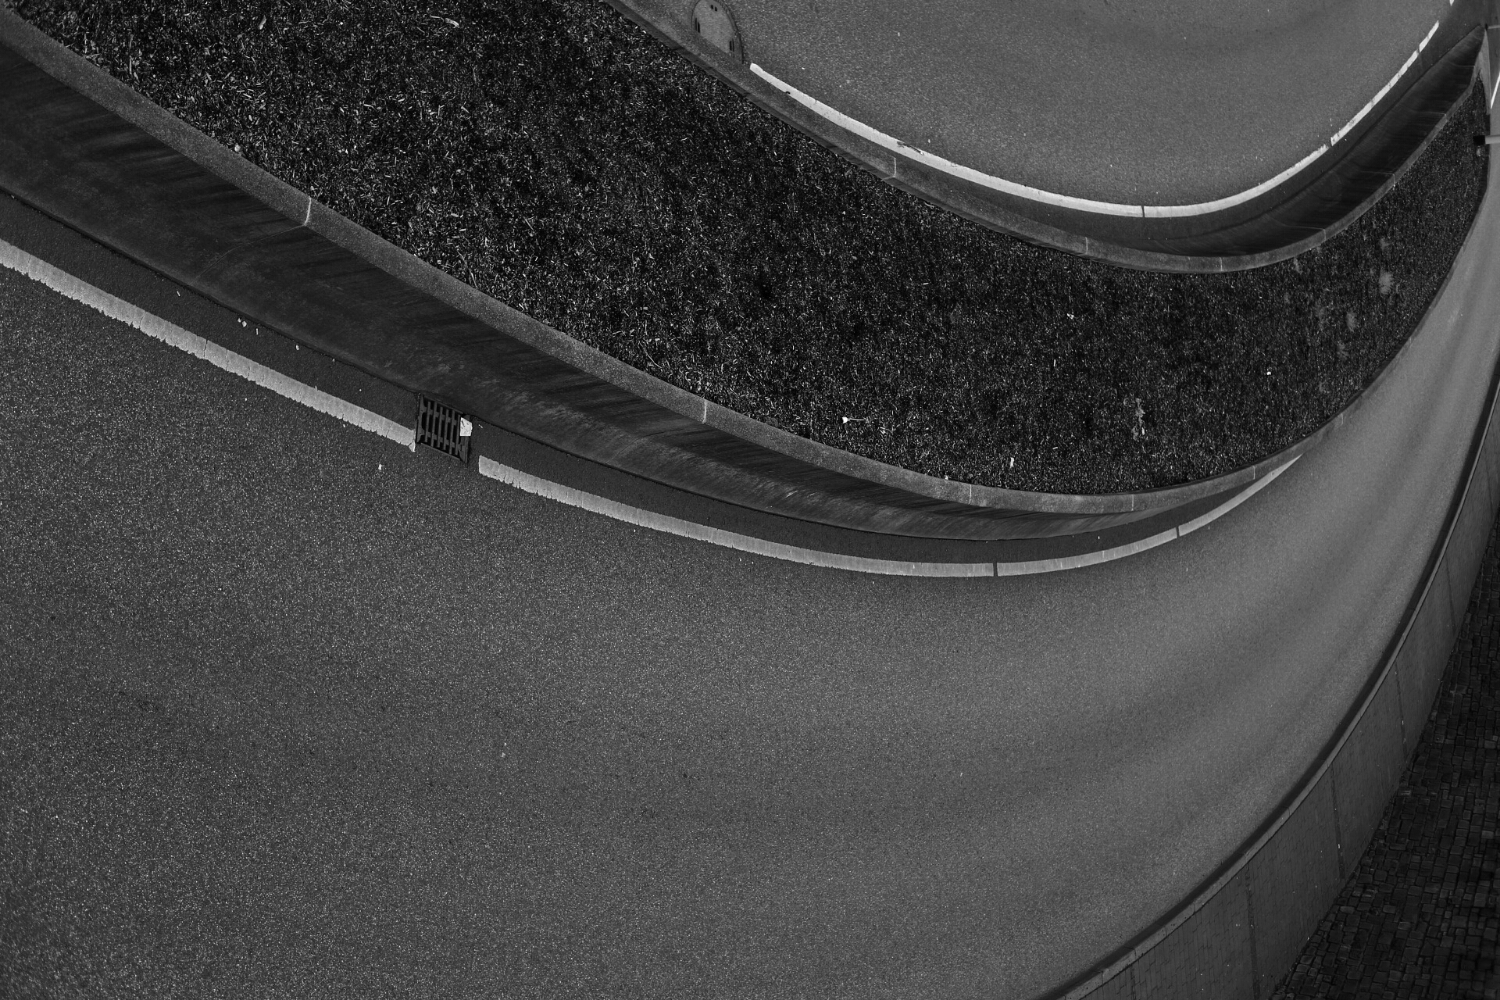
the road is long
Daily photo posts - Day 1
After taking time off work to be with my family, I figure I can afford the time to post one photo a day.

All aboard!
The German DB train workers decided to strike again this week. I went to work early in the hope I would get some photos. The station was absolutely packed full of waiting commuters which was just what I wanted. I only got a few shots before trying to squeeze into a train myself though. Mercifully, the train company still operates the train to Frankfurt international airport I use to get to work. Trains and stations are deceptively dark so it is difficult to get a good photo unless you can use a low f stop or raise your ISO enough for sharp shots.
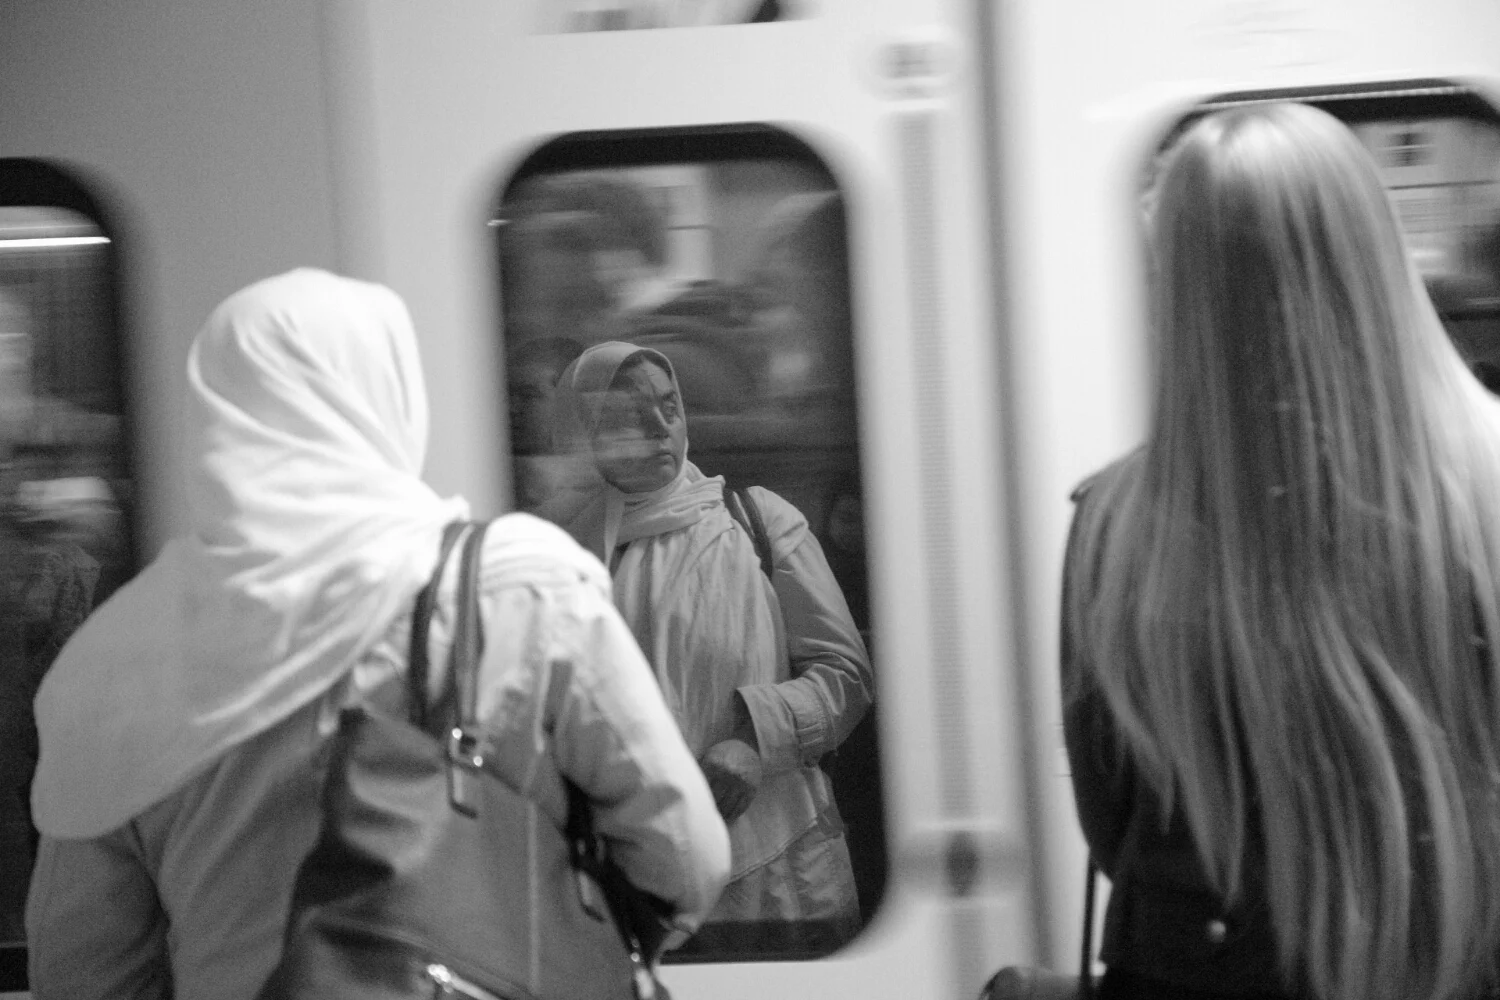
sliding doors
However, in this shot I didn't want to freeze the motion of the train so I used a slower shutter speed to make sure the train was blurred as it slowed down on its way into the station. You can see that the train door looks slanted even though I was almost square on to the train. This is due to the way that cameras work and has been an issue when fast moving objects move across the scene since the invention of curtain shutter cameras in the film days.
A further issue I have noticed with long exposure and light trails is that fine lights appear as a series of Morse code like dashes when using a DSLR. If anybody knows why this is and how to overcome it, then please let me know!
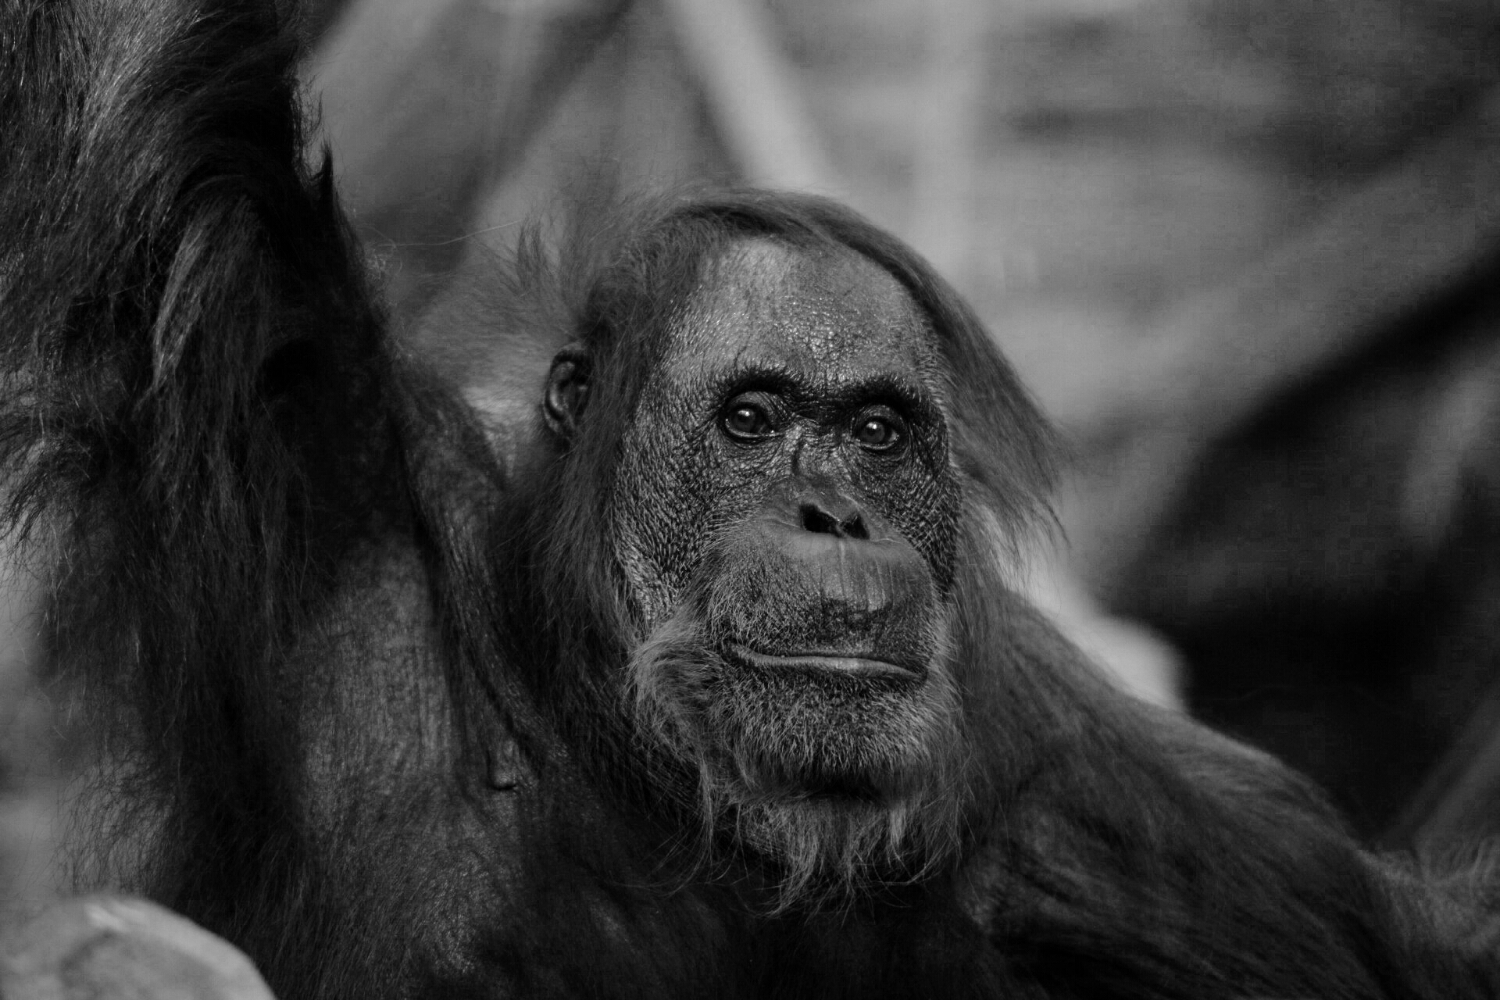
A long focal length helps blur the background behind this majestic Orangutan.
One point advice: going to the zoo
in advice
The zoo is a great place to take photos of animals up close without them being able to run away or eat you.
Read MoreCamera Mods - the strap
The worst thing about your camera's strap is it's guaranteed to have the camera's make and model in massive letters all over it, which at best is meant to give you camera envy, at worst it is free advertising for muggers to come and lynch you.
Read MoreLost in the nth dimension part 3
in shopping
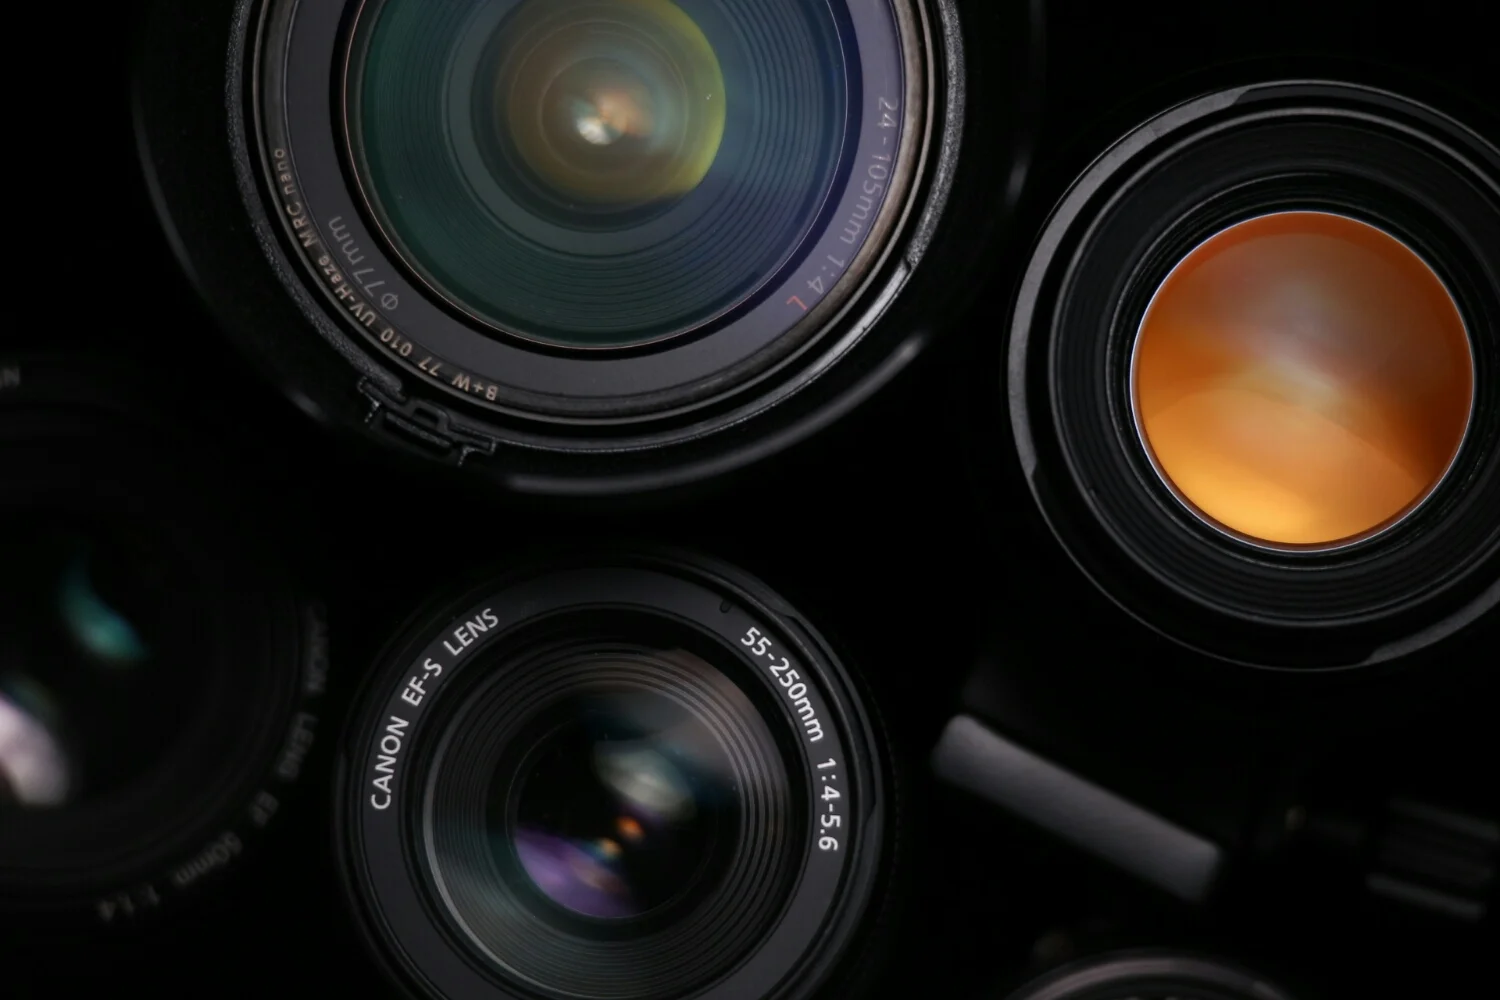
Continuing on from the last post, what other factors can influence lens buying choice?
Weight/length
I own a few cameras and some are quite heavy. You only need to feel a trapped nerve a couple of times to wish you had lighter equipment. If you go hiking with your camera then a light lens or a zoom that allows you to reduce the size of your kit is essential. Likewise, the bigger or longer the length of lens you buy, the more likely you will need to buy a bigger camera bag too! Lighter lenses are also easier to hold without shaking as much. The heavier the lens, the sooner fatigue can kick in which will make photography a drag while also reducing the number of good shots you can achieve. It's a good idea to hold one in a shop for a while to see how it feels.
Construction
Cheaper lenses are often made of plastic while more expensive ones are made of metal. Metal lenses are more durable but heavier. Feel the weight of them in a shop before you buy to see if they feel comfortable for you. Although you may never need to care about the internal construction of a lens, there are certain things to look out for. E.g. you can check if the rear of the lens is made of plastic or metal. If the parts that attach to your camera are plastic, they may wear faster over time. You can turn the focus and zoom ring and make sure it feels smooth and not too loose. If you give the lens a gentle shake, listen out for any loose parts. You can also check out internet forums to see if the lens you like has any common failures. I bought a cheap Canon EFS 55-250mm lens a few years back that turned out to have a design issue as repeated zooming caused the auto focus to fail due to a particular cable wearing out. If I had found this out before buying, I would have got a different lens.
Some lenses claim to have better dust or moisture resistance, but it is mostly marketing jargon, don't expect any lens to work as well once you have moisture in it and certainly don't try dunking one in the sea! Treat any lens well and it should last many years.
Filter size
My biggest pet peeve is that every single lens I own has a different front legs element size so I can't share filters between them. When you are first starting out or on a really tight budget you can consider finding a lens that is the same diameter as any lens you already own to save cash when it comes to sharing filters. Filters have an issue of their own in that unless you spend a lot of money, a bad UV filter can make your photos less sharp while also cutting the light that gets through. I only have a filter regularly installed on my 24-105 f4 lens as I use it the most. I use a B+W UV haze mrc nano filter which is the only filter I found so far that has a minimal effect on photos and create no colour cast unlike cheap filters.
Front element
Does the front of the lens move forward or rotate when zooming or focusing? The best lenses are often internal focusing so the lens doesn't get bigger as you zoom or focus. This means you always know how far you lens is from your subject or any obstacles that could get in the way or damage your lens. This might not be so important for telephoto lenses when bird watching but it's essential when doing macro photography. Having a non-rotating front element means you can use filters (e.g. a polariser or graduated ND filter) you can't use easily if the lens rotates.
Full time manual
As a beginner you may rely on auto focus all the time, but as you progress, taking photos in the dark or macros of objects up close may mean you need manual focus more and more. Cheap lenses can't cope with the photographer touching the focus ring if the lens is set to autofocus. I'm sure it can even ruin the lens as it strips gears of burns out the focus motor. I always prefer lenses that allow for full time manual focus override because if the camera won't focus on the spot you want, you can just tweak the focus without flipping switches or even removing your eye from the camera.
Accessories
Some third party manufacturers like Sigma include more with a lens than the big names; Canon or Nikon. For example, I bought a Sigma 120-400 lens which came with a lens hood, tripod mount and padded case. For those on a budget, buying a lens with these accessories can make for a much better deal as some lenses show very little difference in quality to the more expensive brands.
Firmware/compatibility
Nowadays, some lenses have USB ports to allow you to update their firmware and improve camera compatibility and autofocus accuracy. Third party lens makers may have a more difficult time making sure their lenses work with the camera manufacturers' latest camera models. And don't expect any product will have support indefinitely, so check online to see if your camera and lens combination doesn't have any known problems before you buy!
not all lenses are created equally.
Lost in the nth dimension part 2
What factors are important when buying a new lens? Here are a few to get started.
Read MoreLost in the nth Dimension.
in gear

What is f stop? What can it do for your photos? What are some reasons for not wanting to buy lenses with the lowest f number you can afford?
Read MoreEver heard of parfocal lenses?
I'm not talking about reading glasses although the opposite term with camera lenses is varifocal. I got a tip from a friend about zooming in to focus, then if you zoom out to get more of the scene in the photo you know your subject is still in focus. I had never even thought of doing that before. Mostly I rely on live view and a tripod with manual focus for that kind of thing but even so I would never have touched the zoom ring after focusing. So to me, it just felt wrong. However, it is a good tip but it's only possible on certain lenses.
Parfocal is just a term that means the focus doesn't change when you zoom in our out. With varifocal lenses, the focus moves when zooming.
How do you know if your lens is a parfocal? It doesn't seem to be a key marketing factor in selling DSLR lenses, I guess because there are more lenses that don't have the facility than do (apparently it's standard on cinema camera lenses but fairly rare on consummate optics). If you can't find out online then you can test it yourself. To be honest there are not many trustworthy online resources for this and sometimes people disagree about a particular lens model. So it's best to see for yourself. Just put your lens in manual focus, zoom out and use live view. Use 10x view to make sure an object is focused the best you can get. Take a photo. Then zoom in and focus on the same object again. Zoom all the way back out and take another photo of the same scene as before. Compare both photos. If the focus has shifted and the object in the latter photo is blurry, you will know your lens is not parfocal. It might be best to try the test with objects that are near and far away and repeat it to account for any human error.
Apparently, my Canon f4 24-105 lens is parfocal (or not, depending what you read). However, I still wouldn't automatically use the zooming in to focus technique with it myself. I always double check the focus if i ever accidentally touch the zoom ring. But if you have an older camera which doesn't have live view (i.e. film camera users) or your camera and the object you wish to photograph is stationary, it's perhaps a useful trick to remember.
Your DSLR is not your friend
Your DSLR has a mind of its own. It's wayward and often has a completely different idea of how to change the settings to expose your scene correctly than what any sane photographer would use. If you've ever been in an automatic mode and found your night photo is a mushy mess because your camera decided to bump the ISO up to the Max, you will know what I mean. Yes, your DSLR cannot be trusted! But don't leave it for another piece of tech yet.
One of the reasons things go wrong in auto mode, is due to how a camera tries to interpret a scene. Take a photo of an all white object that fills the whole picture frame, then take a photo of an all black object right after, both in auto mode. (I did this with a serviette and my friend's mobile phone today) Guess what? Your camera will have tried to make both objects look almost the exact shade of boring grey. But why? A photographer wants white things to be white but when the camera is confronted with a pure white scene, it will try to make it into a dull grey. That's because cameras are programmed to give you an average exposure. I will probably go over this in more detail in future as I'm currently in a dark room with a baby alseep on me, but for starters, when you are doing a night scene, don't use all automatic. Set a low ISO, use a tripod and dial in 1 or more stops of negative exposure compensation if you use shutter or aperture priority mode as a night scene should look like it is shot at night. Without the exposure compensation, your camera wants to make the day black sky into boring grey! For the extra cool factor if you are in full manual mode, dial in f16 or greater to get lights with that classic starry effect!
One point advice for beginners
Modern DSLRs can do everything for you in automatic modes but letting your camera take control makes for average photos and means you will never learn how to improve. One piece of knowledge that's been lost since cameras took over choosing the settings is that on a sunny day the general rule is to use f16 and a matching iso and shutter speed. I.e. 100 iso and 1/100 shutter speed. Give it a try in manual mode oin a bright day!
One point advice: live view auto focus
I was trying to think of a quick tip that might help beginner photographers improve but that didn't take an hour to read.
If your camera has live view (the digital screen) then you can use it to make sure your images are really in focus. On Canon cameras, you can zoom in 10x and move the focus point to make sure the thing you want sharp is really in focus. This does take time so is best for night shots, landscapes or still life macros etc where the subject isn't going anywhere and your camera is on a tripod, but actually can still work if you have steady hands and stabilisation. However, in one YouTube video a pro photographer recommended to use live view to focus then turn it off before taking the shot... I totally disagree with that and here's why-the live view image is coming straight from the sensor. Turning live view off and looking through the view finder can cause the focus to shift when you press the shutter button. Unless you have made sure your camera and lenses are completely in tune using custom micro focus adjustment then you risk getting a less focused image than with live view. But that's for another blog post.
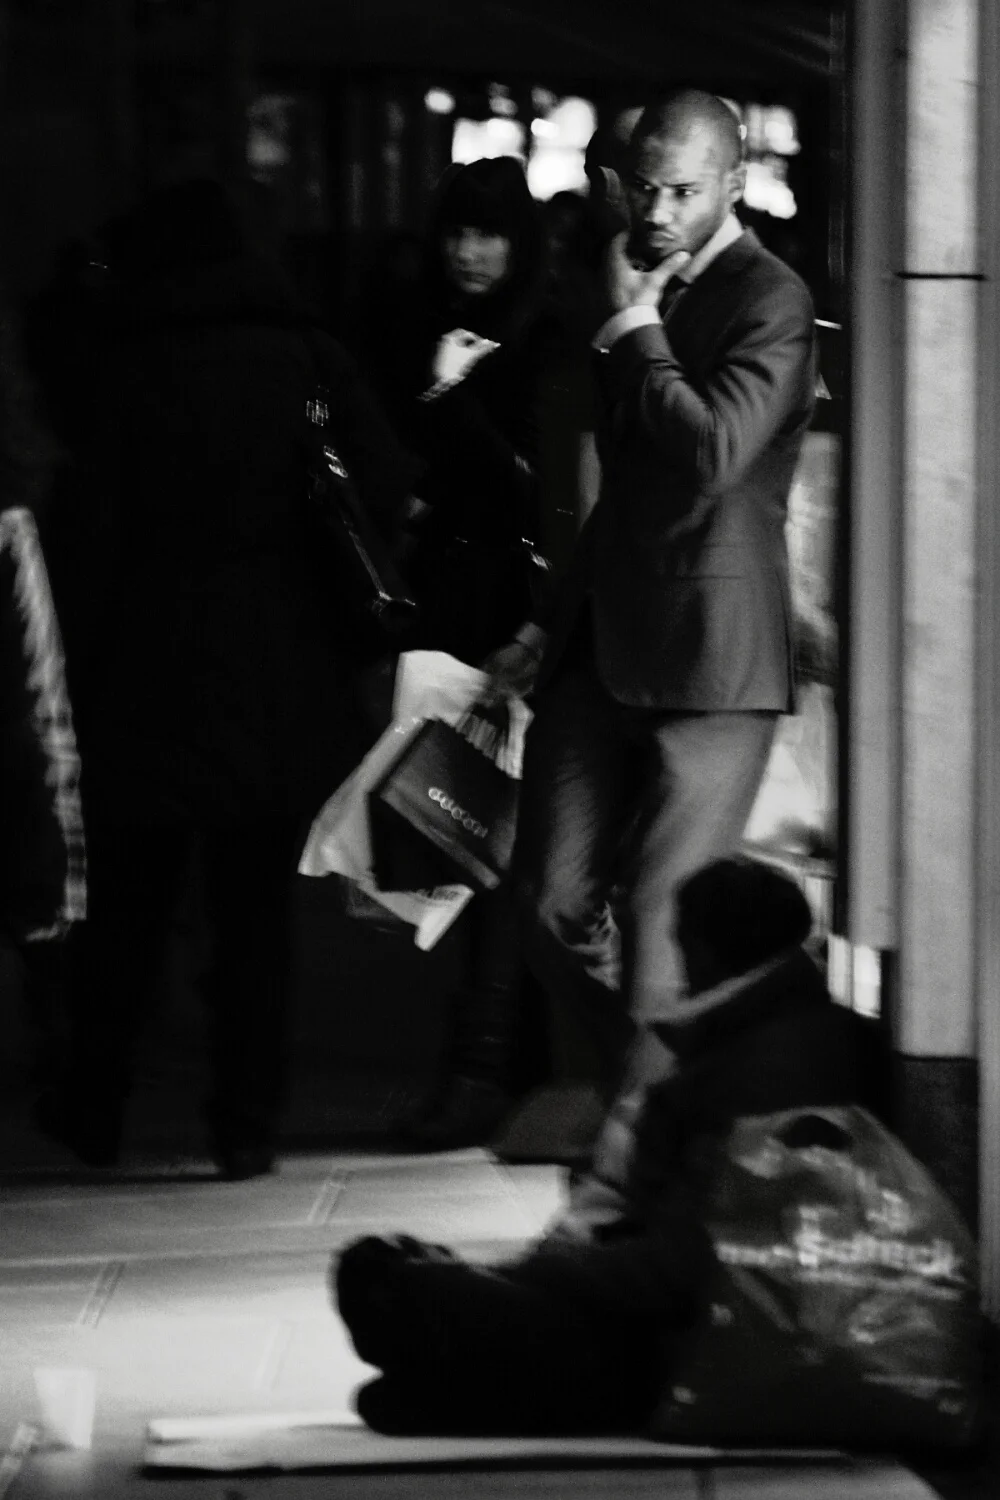
Near misses
This is an image I took a couple of years ago while walking down the Zeil shopping street in the middle of Frankfurt. I spotted the guy sitting on the floor begging while being almost walked over by all the shoppers and as I went to take a photo, the guy in the sharp suit and carrying a Gucci bag walked out. I didn't have the time to check my settings were right and there's a lot of blur as I moved the camera to get the shot. I still like the photo but wish I had prepared more to get the shot I wanted right.
The old school street photographers like Cartier Bresson didn't have digital cameras with auto exposure or even auto focus, so how were they able to get shots that I can still fluff with the latest technology?
It all comes down to anticipating that decisive moment. No matter how good your equipment is, it can't anticipate your needs in 10 seconds time. To anticipate well, you need to know your camera inside out but you also need to know people and how they will behave. The camera is perhaps simpler to work out first. You can figure out what iso, fstop and shutter speed you will need in advance. Half press your shutter to test objects around you and see what values you come up with. Dial in the values that work for most of your tests and you might be close enough to get a good exposure when you need it.
Don't wait until the action is happening in front of you to twiddle with the settings or expect that an automatic program will necessarily get it right for you. A starting point for your settings may be to increase the iso (especially at night) higher than the base iso so that you can increase the f stop. (If you have f5.6 or f8 already set in your camera, you can expect more of the scene to be in focus).
Don't rely on auto focus to work. At night, you can almost always guarantee your auto focus won't work accurately or fast enough. If you have a lens that allows you to use full time manual focus, you could already set your lens at 3m or so away. Learning what the hyperfocal distance is for your lens and settings can mean you don't even need auto focus to get the shot. If everything is set up already, you just need to aim and shoot!
I have a Rollei 35 film camera that has only manual focus and no screen to confirm exactly how far away the focus is set. It would give most modern DSLR users the sweats just thinking about taking photos without a computer to make sure you don't mess up. But the more you don't have the technicology to do your thinking for you, the sooner you will be able to judge what your settings should be or how far objects are away from you. It's even a fun exercise to guess how far away a person, tree, bench etc is and then see if you are correct by focusing with a DSLR and checking the distance on your lens if it has a distance scale.
If I had set my camera up correctly for the conditions and already prefocussed at a reasonable distance, I would've got a much better photo. Do you have any other tricks that help you get the settings you will need without relying on your camera to do the thinking?
Making a logo
I have always been kind of into art and design but never felt any good at it. Making something up is a whole different skill to taking photos and working with what you can already see. So when it came to thinking about having my own logo, I really struggled to imagine what would look good, suit me and be individual. It's no wonder that people (if you believe everything on the internet) pay as much as 4,000 dollars to have somebody design a logo for them!
Not everybody has that kind of money and logo generator websites are out there for anybody willing to settle for something that thousands of other people might be using around the globe. I went old school on my own logo and spent a whole day looking at designs and trying to get ideas. I have a tiny post it note pad that I used to write them down in pencil and biro. I probably lost some along the way but ended up with 22 possible candidates that I wanted to whittle down to my chosen logo.
But the weirdest thing happened as I sat down at my PC. I just typed in my name to get started and then I just went on autopilot..and within 10 minutes had the logo on this site and felt it was right. And it looks nothing like any of the sketches that I had made! It's weird how all that planning and effort just dissolves and something completely different pops out of nowhere in the end. I'm sure there's a lesson in life there though as without all that thinking already, it wouldn't have just happened. My only hope is that my subconscious hasn't pulled the image from somebody else's logo... Let me know what you think or if you've seen it somewhere else!
Hello World!
This website and blog is up and running!
More to come...